


Segments in Designer are as versatile as colorful building blocks are for children. They are the key elements in document design and ensure that documents are CI-compliant, that little changes are quickly done and that office staff can quickly and easily complete documents with adequate content.
Segments can hold content of any kind: static text, images, tables or dynamic elements such as variables, rules, charts or barcodes – everything fits into a segment.
It is always a good idea to use segments for any kind of content, sometimes it is even required and never wrong.
Segments have to be created and filled in Designer. They can either be inserted into documents in Designer or in Workspace in just the way they are needed.
Possibilities and advantages
Beginners may wonder why they have to create a segment first instead of inserting the content into the document right away. This extra step may seem tedious, but the benefits are clear and will surely become apparent over time.
Re-Usability
An existing segment can be used in as many documents as desired.
Central Update
If central content changes, a single change in the segment is enough. You do not need to change every single document. Instead the new values from the segment will be shown – either automatically the next time you open the document or using the Refresh button if the document is already open.
Selective Update
If the content of a segment changes for some documents only, you can easily clone the segment, change the clone and assign it to selected documents.
Infinite combinations possible
Segments can be combined in any way to create different documents. Gender-specific adaptations using rules in segments are a popular example.
Dynamic relationships and dependencies
With segments and segment groups you can model any number of complex relationships and dependencies, for example, to complete a contract document with content for many different cases.
Positionioning
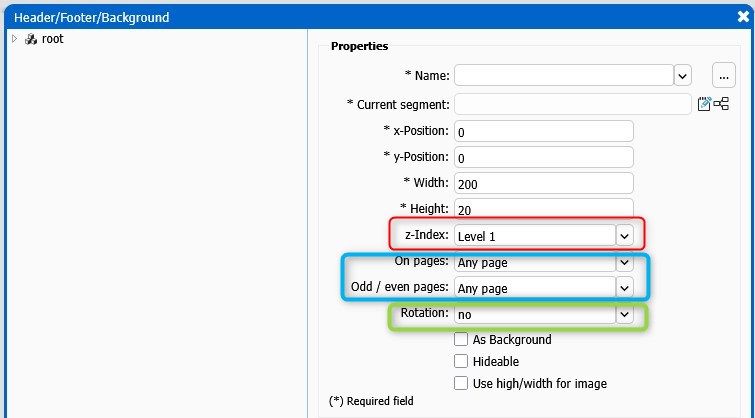
The position of a segment can be precisely defined using x- and y-coordinates.
Access rights
Segments can get different access rights to prevent undesired changes or allow release processes.
Three ways to insert segments
In Designer there are three different ways to insert segments into a document. They determine their subsequent use and often cause confusion for beginners. Therefore, it is important to be familiar with the different options and their differences.
Option 1: External section
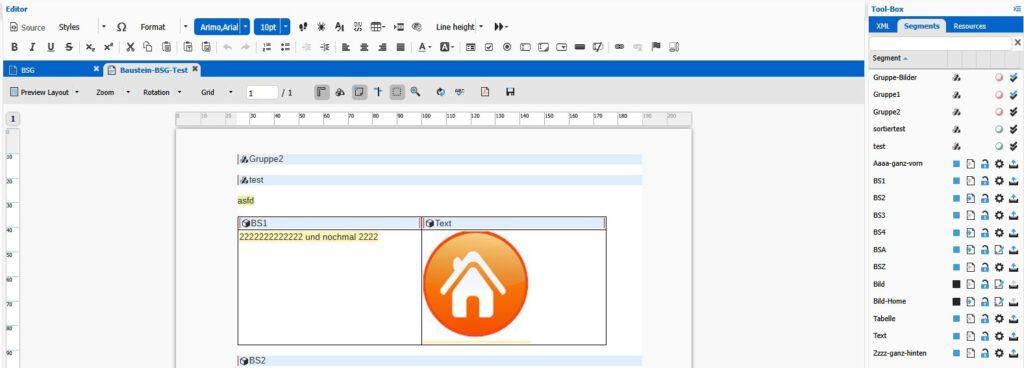
If you insert segments from the document tree into a document with drag and drop and if you release the cursor when it is over the gray border area, the block will be inserted as a so-called “external section.” For images, this is indicated by lighter colors.
Alternatively, you can insert the segment using the “Header/Footer” screen.
External sections are perfect for master documents and when there are special requirements regarding positioning and formatting.

Option 2: Positioning in main area of the document
If the cursor is released in the main area of the document during drag-and-drop, that is the exact position where the segment will be inserted. The image will be displayed without changes to its colors.
If a segment is inserted in the main area of a master in this way, it will not be visible in the document.

Option 3: As placeholder or segment group for workspace
Segments which can be selected and inserted in workspace on a case-by-case basis must be inserted into the document from the toolbox, either individually or in groups.
Checklist
The following questions show a lot of possibilities you have using segments. They shall also help you in your work so that you can quickly reach your desired goal when creating a new document.
| Question | Example | Proceeding |
| Are there elements which are included in many documents? | logo |
|
| Is there content with only little differences but the same formatting? | address of different company sites |
|
| Is a defined position required for the segment? | QR-code on a shipping label |
|
| Shall the user in workspace decide which segment to insert? | different clauses and cases in a contract |
|
| Shall the segment appear in a defined position in a document with several pages? | content which shall only be placed in the last position of the last page |
|
| Shall the segment be rotated in the document? | document has landscape orientation, logo has to be rotated |
|
| Shall several segments overlap partly? | style element |
|
Where segments are mandatory
As mentioned earlier it is never an error to place elements in a segment. Especially when dealing with lots of elements, it is recommended to insert elements in segments, e.g. when you want to
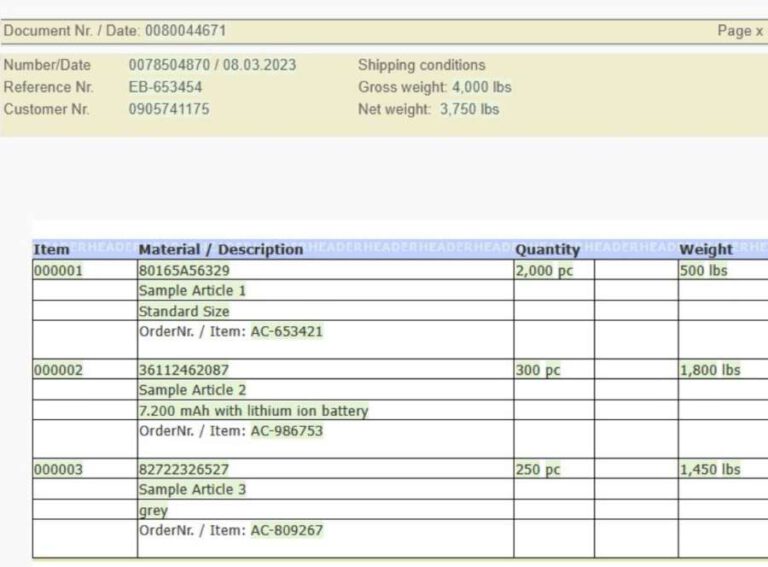
- insert images into a table. Place the image in a segment first and include the segment into the table.
- create nested rules. Create a segment with the inner rule and place it in the outer rule.
These are the easier use cases for single segments. You can also combine segments in multiple ways, create dependencies so that two segments can only come together or instead exclude each other, be mandatory or optional.
We will describe the possibilities in a separate post.